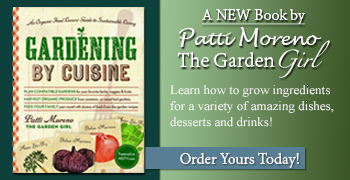
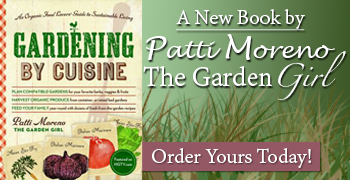
Produced by
Patti Moreno
Contributor to:


Raised Bed Gardens
How to Build a Raised Bed
I fell in love with the idea of raised bed gardening when I quickly learned how unreliable city soil can be. This video is all about getting you started with raised beds, including how to build your own. I will also demonstrate how to build a hoop house. The raised bed that you’ll see me building here only cost me $40. My raised beds are built, based on four foot beds and eight foot beds which happen to be the general measurement standard for lumber, which makes it easier. Let me share with you some of the reasons for my love of this method of gardening.
Read more...Vegetable Gardening: How to Prepare a Raised Bed Garden for Planting
I'm here with my friend William Moss, who is going to give us a quick lesson on how to prepare a raised bed for planting. We have all we need; a good location with about 6-8 hours of sunlight, and a raised bed that needs to be cleared out and prepared for the next planting season.
The first thing to do, especially if you are working in a raised bed that was used last season is to remove last year's debris. Never fear, the "debris" will not go to waste. It will go right into my compost bin.
Read more...How to Sow Seeds in a Raised Bed Garden with William Moss
It’s time to start getting the cold weather crops into the ground so today, I am joined by my friend, William Moss and we are talking about sowing seeds in a raised bed garden. See how simple it is to usher in a bountiful harvest.
We are planting lettuce, radishes, Asian Greens and onions. Onions do take a while so we need to get them in the ground now.
Read more...Gardening Tips
Deadheading Plants with William Moss
What is deadheading? Sounds spooky.Well, it's not. It's just a funny word for pruning.
I'm here with William Moss who is going us to tell us everything we need to know about the process of deadheading and why it's important for the overall health of your bedding plants.
Read more...How to Install a Simple Garden Retaining Wall
I’m here with Kip Gardener from Filtrexx and he is going to show me how to use Gardensoxx to create a retaining wall for a sloping area of my garden that has a bad erosion problem.
Garden Soxx were originally invented for erosion control but because they are so versatile they have taken on multiple uses including planting in unexpected places. Today, we are going to see them being used as they were intended – to stop erosion. And then, of course I’ll use them to position plants in unexpected places.
Read more...How to Check the Sun Exposure in your Garden
Although I have been doing this for many years, I still worry about my sun conditions. To be a great gardener you have to know everything there is to know…about your garden. You need to know about the condition of your soil, you have to know just the right amount to water and then you have to know all about the sun…which you can’t control, no matter how you try…Until now.
You still can’t control the sun, but you can know where it shines the brightest and where it doesn’t. This type of accurate sun knowledge will help you make smarter choices and will guarantee that what you plant will grow!
Read more...Insect Repellent for Gardeners from Sloggers and Insect Shield
What do gardeners need most to protect themselves from the dangers of the garden (sun, ants, flies, chiggers, midges, ticks and mosquitoes)? This is not a trick question. There is actually a solution. Sloggers have invented these excellent products that take sun screen and a big hat to the next level. Sloggers have introduced a line of insect repellent gear that looks great and protects even better. The repellent, which is all natural (found in chrysanthemums), is odorless and harmless and is sprayed directly into the garments. The repellent saturated hats, bandanas, and other items are good for over 70 washes. With these cool hats and scarves, your life has just been made amazingly easy. It's the bugs who have the problem now.
Read more...Plant Files: Hostas
They’re everywhere and you may not even know what they’re called. They’re called Hostas and they are one of my favorite landscape plant. These hardy, herbaceous, perennials have leaves and stems that die down at the end of the growing season. As you watch, you’ll recognize them. They’re all over doctors offices, public spaces, parks, lobbies, and in the backyards of all of your wise gardening friends.
Read more...Green Resolutions for the New Year: Installing an Eco Lawn
An Eco lawn is the ultimate green solution. An eco lawn uses 75% less water than a regular lawn…watch, read and go green!
An eco lawn is a combination of seven different fescue grasses that can reduce your water consumption, be a friend to the environment and will be the best lawn experience you’ve ever had! Not only is an eco-lawn environmentally friendly, the lack of maintenance required will make this lawn your new best friend. This lawn is virtually maintenance-free, drought resistant and insect resistant. It even grows in shady areas, rocky areas and in poor soil.
Read more...My Garden Shed
Welcome to the smallest most efficient space that holds everything that I hold dear.
Welcome to my Garden Shed. It is 4X4 made of rough hewn pine. Let’s put it this way, it’s so small, it couldn’t be filmed inside. So, from my doorway, I am going to take you on a little tour.
Read more...How to Build a Water Garden
If you really want to bring your garden to life, integrate a water feature. Water features beautifully illustrate that a garden is a living, breathing thing! This video shows you how I easily put together a water feature using common elements that are easily found in your neighborhood garden store. A while ago, I did a paving project and there was some leftover stone dust. As always, my water feature incorporates a raised bed, which very effectively houses my water feature. In the raised bed, I fill it 1/2 way with a layer of stone dust. Then I dig a hole in the center of the sand dust where I put your pond liner. Then I back fill the area around the pond liner with soil. Once the pond liner is secure, I add some stones for a more natural look and to weight down the actual pond liner to make it more secure.
Read more...How to Cement Stones Around Your Pond
I’ve had my water feature in my backyard for about a year now, and I love it. I love it so much that I want to make it permanent. Let me show you how…
I have an 80 pound bag of Quikrete which is sort of an “instant” concrete mixture. As you see, I already had some nice natural stones around my pond, but they weren’t permanent, until now.
Read more...30 Minute Flower Garden
What else can you do in 30 minutes that will be this rewarding?
No more excuses. Welcome to your 30 minute flower garden. In 30 minutes you will be able to plant petunias, zinnias, hydrangeas and any other garden delight you have dreamed of, but always thought it would be too much work…Wrong!
Read more...Organic Fly Trap
I hate to complain, because I have a job that I love. But if I had to complain about one thing, I would say that these flies are driving me crazy!
So I decided to get some disposable fly traps and post them around my garden.
There are all different kinds of fly traps many that you can make yourself, but I bought this fly trap and all I had to do was put in a very strong-smelling bait, and fill it with water and turn it over. Then I used some twine that I had around the house to hang the traps around my garden.
Read more...Pond Maintenance
Being a gardener is a dirty job. And, a wet one. Today, I am going to take care of my 7000 gallon pond, which is full of sunfish. When my pond is properly maintained, it will give me about 300 pounds of fish a year.
The first thing I have to do is put in some Mosquito Dunks which kill mosquito larvae. It is actually a chemical known as BT (Bacillus Thuringiensis). Once I have thrown several of those into my pond, I will also add some barley straw pellets, which raise the PH level of my pond and make it a much better environment for my fish.
Read more...Six Ways to win the Fight against Garden Pests
Your garden’s enemies are so small you can’t even see them, but they are powerful enough to wreak havoc on all of your hard work! Check out this video which focuses on my personal secret weapon (see tip #6). Below are five other non-toxic ways to engage in garden wars and win!
Read more...Square Foot Garden
Frequently Asked Square Foot Gardening Questions – Part 1
Here I am joined by my friend and fellow gardener, Mel Bartholomew, as we tackle some really good questions about Square Food Gardening. These questions came from you and today I am going to pose them to another square foot gardening enthusiast. Take it away Mel...
1) What kind of wood should we use to build a square foot garden?
Mel’s answer is simple: FREE. Mel suggests that getting free wood is easier than you think. Just one ride around town, you will most likely see a construction site and where there is a construction site there’s always a dumpster. Most dumpsters hold lots of scrap wood – which is exactly what you need for your square food gardening!
Read more...Frequently Asked Square Foot Gardening Questions – Part 2
I’m back again with Mel Bartholomew and this time he is answering the burning question…drum roll please…
1) Is 6” really deep enough to grow a vegetable garden?
The answer is yes! As Mel explains the benefit of 6” instead of 12” is that it is just more efficient all the way around. It saves waters, saves seeds and it produces the same quality of vegetables that a more deeply planted garden would. But we understand the question. We have all been taught that for a garden to grow you must dig deep, and till and toil in the garden for hours a day. But Mel learned a most important lesson on a visit to a commercial grain house. He saw a table with 6” boxes on it and healthy plants like peppers, eggplants, tomatoes and beautiful flowers. When he asked how it was possible, they said it’s the “perfect soil,” which got Mel thinking…and the way that Mel’s mix was born. Once again, Mel’s Mix is 1/3 peat moss, 1/3 vermiculite and 1/3 compost. It works!
Read more...Square Foot Gardening Tips: November
It’s November and Mel Bartholomew has the answers to your monthly raised bed gardening questions. The biggest question based on the weather is simply how does one garden when it’s so cold?
Of course, Mel has the answer.
There are some simple ways to protect your plants from the cold. Of course, it always matters where you live and what you have planted, but the elements affect every plant no matter where you live.
Read more...Square Foot Gardening Tips: September
It’s September, the beginning of the skies turning all sorts of miraculous colors. And as I marvel at the sky and its colors, I look down at my own abundant harvest and wonder what I will do with so much good stuff!
Today, Mel and I are going to talk about ways to put it all up.
Although, it’s September, you have many more months to go through the season and some ways that I store my fruits and vegetables are: Freezing, Drying, Canning
Read more...Square Foot Gardening Tips- August
It’s hot! That’s because it’s August, which means only two things to a gardener: it’s harvest time and time to start new vegetables for a fall harvest. The good thing about this time of year is that although it is another planning season, it’s like the planning you do to prepare for spring, but the other way around. Instead of starting your seeds inside and then having to transplant them, you can plant certain seeds outside now and the natural process of the temperature dropping supports the process without your help.
In August Mel and I both have abundant harvests of Eggplants, Squash, Herbs and Corn. In our vertical gardens there are pole beans, cucumbers, tomatoes and vertically grown squash.
Read more...Square Foot Gardening Tips: June
In May we told you about vertical gardening and in June you can already witness it in action right before your very eyes. Tomatoes are the teenagers of the garden and they need guidance. Mel and I suggest that you check on them weekly and sometimes you may have to move them and encourage them to grow up and intertwine them in the vertical support.
You may also see your peppers and eggplants, which are already growing to be substantial. You must be mindful of them since when the subtle wind and light rain of June can come and potentially knock the whole bush down.
Read more...Square Foot Gardening Tips: May
It’s May and the Garden is alive with activity. The plants are growing and blossoming and you have already started to harvest and plant some of your summer crops.
In one raised bed you may see that you have squares of 16 radishes, squares of 9 beets or squares of 16 carrots and now you can take an empty bed and prepare that for the next set of crops.
To do this, Mel suggests that you use a handful of blended compost to prepare and restore the existing soil. It should be compost that includes several diverse elements. Those mixed elements would be from different sources such as a) yard waste like leaves and grass clippings b) barnyard manure (manure of animals that don’t have meat diets) which includes cows, horses, chickens, ducks, etc…and c) elements such as wood chips, bark or sawdust. This blend makes for rich and nutritious compost.
Read more...Square Foot Gardening Tips: April
April Showers bring May flowers! In this video, Mel and I are going to give you some quick fun hints about what you should be doing in your garden during this exciting time for vegetable gardeners, the beginning of spring.
It’s April and so everyone is starting to plant! For those of you who started inside, there is a transition that must take place for your plants or else they will struggle with the suddenness of being moved outside. Although it is April, it’s not necessarily as warm as you think or certainly not warm, consistently. Your seedlings have become accustomed to the very stable environment that you have set up inside. Outside it may be cooler on some days or in the evenings and it may even rain heavily! And there will also be wind that they are not accustomed to.
Read more...Fruit Trees and Berry Bushes
Lingonberries in the Edible Landscape
Have you ever heard of lingonberries? Most likely, not. But if you know anything about Sweden or you’ve shopped at IKEA, you’ve at least heard them mentioned. Let me tell you what they are. The lingonberry is a hardy perennial evergreen shrub, closely related to blueberries and cranberries. They can be found in forests in northern Europe, Northern America and Canada. They are a small tasty berry that is a mainstay of Swedish cuisine. In Sweden and other parts of Europe, lingonberries are used in every thing imaginable, including wines, liqueurs, soda, jelly, jam, Swedish pancakes, sauces for with meats and fish dishes and any other time that blueberries or cranberries are used. The unique tartness of lingonberries offer a whole new dimension to traditional dishes.
Read more...Sweet Cherry Trees are a Great Addition to Every Home Garden for Fresh Eating
Here are some of the reasons why I love cherries! 1) Cherries contain antioxidants that help reduce inflammation and pain as well as help fight chronic illnesses such as reducing cholesterol; 2) Cherries make a great snack and 3) Cherry blossoms signal spring!
My new cherry trees have just arrived and in this video you will see how I prepare them to be planted in a container. You will see that these trees look different from the ones that you are used to seeing me work with. These are brand new bare root trees which means they have to be prepared for a container, differently than other already potted plants. Did you even know that it’s possible to plant trees in a container? Let me show you how.
Read more...Tips for Growing Grapes
There are so many uses for grapes. Fresh grapes make a healthy fruit snack eaten by the bunch and it’s a great addition to a fruit salad. You can also make delicious jams and jellies and can them to enjoy all winter.
I’m so excited! They’re finally here! My Sweet Lace Grapes that will grow beautifully in my patio container garden. If you are not familiar with this type of grape, I’ll show you. Sweet Lace grapes are different than the other types of grapes that I grow. The Sweet Lace plants are slightly more delicate with a lacey ruffle in their foliage.
Read more...How to Plant a Tree
I thought it would be nice to learn how to properly plant a tree. So, I asked my friend, arborist, Gary Overton, to help me show you how to plant a tree, the right way. This is something anyone can learn. The best time to plant a tree is the spring or fall. Fall is usually even better than spring because in most places temperatures are moderate and there is plenty of rain.
The only type of tree that I don’t already have in my garden is a Japanese Maple – so today that is what Gary and I are going to plant.
Read more...How to Prune A Tree
This is your lucky day. I am going to give you a 5 minute lesson that will change your life and the life of your trees. I am joined by my friend, Gary Overton, an arborist, who is helping me prune my very large plum tree while teaching us all to prune properly.
Gary explains that the main thing you want to do when pruning a tree is to eliminate the water spouts (some call them “suckers.” These small little sprouts can’t produce fruit. By removing them it allows the trees to deposit their nutrients in places where it will count.
Read more...Growing Blueberries
My mouth is watering thinking about all of the delicious things I can make with blueberries; Pie, Grunt, Jelly, muffins, Pancakes, Smoothies, Bars and cereal...And they’re good for you!
New England (zones 4-7) is the best area for blueberries to thrive. What’s great about these healthful anti-oxidant-rich berry is that they are durable and versatile and can grow in lots of other zones, as well. You can plant blueberries in the spring, but they’re also excellent to plant in the fall. Planting blueberries doesn’t take much work. Find a place to plant your blueberries where they will receive full sun at least 6-8 hours a day. If you are in more of an urban environment they grow well in clay or rocky soil, too!
Read more...Designing Sustainable and Edible Landscapes
Americans think big! And our obsession with all things big has to change for the good of the earth. Large lawns were once meant to symbolize status. Back in the day, large lawns earned their reputation with good reason. Historically, a large “lawn” meant that there were plenty of sheep and cattle grazing on the land. That is usually not the case when driving through any town USA these days. Today’s large lawns only mean one thing: Waste!
Large lawns waste acres of usable real estate, use tons of water and maintaining them create noise and air pollution. Additionally, the pesticides needed to keep grass alive, poisons our soil, sewers, and ground water with harmful pesticides and petro-chemicals.
Read more...Design a City Orchard by Planting Fruit Trees
Ancient Greek proverb: “A society grows great when old men plant trees in whose shade they know they will never sit in.”
The value of trees:
- Trees combat climate change
- Trees clean the air by filtering pollutants
- The percentage of tree canopies have steadily declined in major metropolitan areas since the 1970's
How to Grow Apple Trees
In this video, I am going to take you on a little tour through my city apple orchard.You will see that I have planted Semi Dwarf and Dwarf trees and they are Red Delicious Apples and Cortland Apples.Both of these varieties are excellent for cooking but the Cortland apples are slightly tarter, making them perfect for salads. The most important thing to remember about growing apples is that they take a few years before they fruit. These orchards that we are walking through are the result of work that I did nearly two years ago. So be patient!
Read more...How to Grow a City Vineyard
Welcome to my Grape Arbor Trellis. Here you’ll see me training my grapes to grow upward on the trellis. I am using jute twine which is an organic material that complements the look of my garden. Because it’s natural it will eventually decay – but by the time that happens, my grapes will have already taken hold of my arbor.
As I attach the grapes, I do it loosely because the sun and rain will cause the jute to shrink. By giving the jute ample length in between each attachment, it allows the grapes and the jute to do what they do, without hampering the process.
Read more...Indoor Gardening
Hydroponic-Aquaponic Indoor Garden System
What is an Aquaponic System and why would I want it in my house? Well the answer is three simple letters: USL!
Hydroponics and Aquaponics are sustainable food production systems that combine a traditional aquaculture (raising aquatic animals) with hydroponics (cultivating plants in water) in a symbiotic environment. Installing an aquaponic system is helpful for growing plants and fish in the winter climate which can sometimes be off-limits for growing anything. It took me a full days to do this, but it's worth it.
Read more...Know When to Water your Plants
When its fall, it’s time to start your indoor garden.
I have already started to bring in my containers with my rosemary, lavender and citrus trees. The only problem with the indoor garden is that there is no drip irrigation system inside and I need to know, for sure, when I need to water my indoor plants.
Read more...How to Start Seeds Indoors With A Hot House
Here in New England and across the Northern states, we tend to give up on our gardens as soon as the snow begins to fall. The ground is frozen, the days are shorter, and the weather is fierce!
But as you'll see, you don't have to force your inner gardener to hibernate. Especially in colder areas where our growing season is so short, it really pays to start plants from seed indoors. That way, not only do you save a lot of money on plants at the nursery - although that is a big deal since plants can run anywhere from $5 to $25 a pop or more! You also start the season with sturdy, hardened plants ready to put in the soil as soon as the ground thaws. Starting seeds early also gives you earlier and longer bloom times.
Read more...Starting a Vegetable Container Garden Indoors
This video will show you step-by-step how I transformed my 6X14 sunroom into the perfect indoor garden.
Summer is long gone and the harsh, cold and snowy New England Summer is on its way. What’s a Garden Girl to do? Start planting my indoor garden! Come with me, I’ll show you how to do it. All you’ll need is a small space (as little as 6 square feet) and a little bit of money for supplies, under $200 (which is less than ½ of the cost of a commercial indoor garden kit). Every time I step into my indoor garden, I’m greeted with the delicious aromas of fresh basil, oregano, lavender, mint and lemon and I know it was worth the work. I’m sure you’ll agree.
Read more...Organic Vegetable Gardening
How to Plant a Three Sisters Garden
The wisdom of a Three Sisters Garden
The corn serves as a pole for your beans to climb. Corn requires nitrogen to grow; Beans absorb nitrogen from the air and convert it to a form that other plants like corn can use. The beans climb up the corn stalk an provide extra rigidity preventing the corn stalk from falling down during wind or rain. The squash balances it out providing shade; keeping weeds down and moisture in the soil.
Every year I plant a Three Sisters Garden. In this video, you’re just in time. I’m going to get you into the action, honoring this awesome Native American tradition by teaching you how to plant this garden that promises to “sustain life.”
Read more...How to Start Vegetable Seeds
What’s the big deal with planting seeds? Seems simple enough…Just put your seeds in the dirt, water and hope. Or, you can do it the right way and have exactly what you want: germinating seeds, glorious plants and perfectly grown organic vegetables.
Read more...Controlling Weeds with Mulch
Weed control has been an issue for gardener’s going back thousands of years and one of the things that bedeviled me in my early gardening years. Let’s face it, weeding is pain, it can be back breaking, ruin the “look” of your garden and rob your plants of needed sunlight, water and nutrients. But a few years back I learned that weeds are essentially missed placed plants, they are kind of like teenagers, they just want food, generic drugs, shelter and a place to reproduce and your garden is a wonderful place for them to do that. As an organic gardener your goal isn’t complete eradication, if it is you’re probably reading the wrong magazine, the goal is, like with teenagers, control and I find that there are three major steps in controlling your weeds. The most important thing is proper set up and preparation. If you take the time to set up your garden properly you can reduce your time in maintenance, by almost 70%. The simplest thing you can do, weather you garden rows or in raised beds like I do is provide an actual physical barrier to keep those pesky weeds in check.
Read more...30 Minute Vegetable Garden
Welcome to "no-excuse gardening." In just 30 short minutes you can have a vegetable garden, which will be an excellent first project if you are new to gardening. If you are a seasoned gardener, using Garden Soxx is just the perfect way to start something new, without wasting too much time or effort in the process.
Garden Soxx, which were originally designed for erosion control, have also become a new way to plant in small spaces, which makes them perfect for raised bed gardening. Garden Soxx are cleverly made from a synthetic fabric which is stuffed with 1 cubic foot of compost, and will last from 3-5 years.
Read more...Vertical Gardening
What better way to make a chain link fence beautiful and useful than to grow juicy grapes vertically? Watch the vines transform the ugly industrial nature of the chain link fence as your vining plants grow...
There are no limits to what you can do, if you just think outside the box. The urban gardener’s biggest challenge is space, but that never stops me and it shouldn’t stop you, either.
Read more...Growing and Planting an Italian Kitchen Garden
Ciao, Bella!
If you haven’t already noticed, I have a soft spot in my heart and stomach for Italian Food. Why, Garden Girl, you ask? Because, it’s so easy to make; there are endless possibilities and it is always delicious. Italian Food has always been my family’s favorite, but once I started gardening and preparing my sauces with fresh grown herbs and vegetables, they can’t seem to get enough of the stuff! Just wait until you try it on your family.
Read more...Harvesting My Three Sisters Garden
This video is part two of my Native American Three Sisters Garden video series.
The Iroquois Native Americans were really on to something! In their tradition, every single year, I plant a Three Sisters Garden and watch in awe as it thrives. This easy-to-plant garden is the epitome of “nature taking its course.” Amazingly, like three siblings, the plants interact with each other in a complementary nurturing fashion; protecting each other from the elements. The three sisters are corn, beans, and squash and they fit beautifully in a raised bed. After only four weeks, this video shows me harvesting beans from the garden with my daughter, Alejandra. She's always a big help at harvest time.
Read more...Four Season Gardening
Believe it or not, it is winter, and you will find me in my garden - still! And I am going to show you how your garden can still thrive in the winter. Raised Bed gardening makes it all possible, by extending the possibilities for your growing season.
The keys to winter gardening are having the proper seeds and the proper environment. By creating a micro-climate you can create a warmer environment than what is actually outside. The goal is to raise the temperature in your micro-climate to somewhere between 35 and 55 degrees Fahrenheit.
Read more...Spring Garden Prep Work
The early bird gets the worm and a whole lot more! My early spring planning has paid off. With my use of hoop houses, I was able to plant two weeks before the last frost and now I already have some edibles! This particular raised bed is a companion bed filled with several different things that all work together. This bed contains sunflowers, two rows of eggplants, cucumbers growing on a trellis, basil, marigolds, Mesclun salad, potatoes and finally corn and beans (Think Three Sisters).
In New England, where I live, we have a short growing season. My Hardiness zone is 6 which means the Avereage low temperatures fall between 0°F through -10°F and in Boston my growing season is only 6 months out of the year. Extending my growing season is necessary for me. I create micro climates around my raised beds with the hoop houses. As long as the temperature around the plants stays around 55°F, cool weather crops like lettuces, cabbages, and Asian greens can grow.
Read more...Vertical Gardening with Watermelon
Watermelons are vining crops. Large vining crops – but don’t let their size intimidate you. (Watermelons can grow from 1 to 250 pounds!) City gardeners are still in the game. You, too, can grow watermelons on vines in a small space for the same refreshing result. This short clip shows you how I use a version of a sandwich bag tie – these come in a roll and you can choose the length you want – to attach your plants to the upright support. You should attach your stems in several different places along the trellis and train them to weave through at the top. Watermelons take anywhere from 60 to 120 days to fruit.
Read more...Growing Cucumbers
For the first time, you may say – what is Garden Girl doing? I know, I know – plants should not be planted so closely together. If you are a purist, you are shocked! But you have to remember, I’m originally from New York City. I know how to do everything in cramped spaces. I am a small space gardener and so I have had to learn to be creative and think outside the box. My secret is using raised beds, lots of worms and livestock which create the best fertilizer for my soil. With this powerful soil mix, I can’t go wrong. Today, you will see me planting four different types of cucumbers in my raised bed. Telegraph Improved Cucumbers were originated in England and they grow to be 18” long! I am also planting Boston Pickling Cucumbers which grow to be only 7-8:” long and their thick flesh makes them perfect for…pickling, hence the name. The third variety of cucumber I am planting is the Suyo Long Cucumber that originated in China.
Read more...Vertical Gardening with Cucumbers
Here you see me working with vining crops, this time Cucumbers. You will see the progress they have made in a short time. When I come out to look at the progress of my vining crops, I’m always looking for just a couple of things – that the plants are attaching themselves they way they should and that they are starting to flower and even show some signs of fruiting. As you can see with my cucumbers there are several small cucumbers starting to peek out and in one place a cucumber was starting to attach to my tomatoes and I had to gently re-direct them…vegetables are just like children!
Read more...How to Harvest Organic Vegetables Part 1
Harvest time is when I get to literally touch, feel, and taste the fruits of my labor. Today is a particularly good day to harvest because it is right after a rain and that is when vegetables are their freshest. In this video, you will find me in my main garden, weeding (always weeding!) and gathering the things that are ready to eat! In this garden I have planted a wide selection of fruits and vegetables and today I am delighted to see that my cucumbers are ready! I also have assorted lettuces (red romaine, regular romaine and arugula); red corn, beans, eggplant and tomatoes. The varieties and the qualities of the food I produce costs me pennies. Yum Yum. Watch the next video – as the harvest continues…
Read more...How to Harvest Organic Vegetables Part 2
Well you never know what you’re going to find in the garden. You hope to find the fruits of your labors, or you may find what I found in my fruit orchards…that my little girl and her little friends like fresh fruit as much as I do! The blueberry bushes had fruited and today they are bare. At least the girls had fun! Although my dwarf Courtland Apple tree looks promising, they are not quite ready. I continue looking until I see the best news of the day – a huge ripe watermelon that will be saved for my husband’s birthday dinner. He’ll be happy. Watermelon can be grown in small spaces with a vertical support. This year I was able to grow a watermelon this is yellow inside and oh so sweet. The Harvest is kind of like Christmas and oh so fun! Come back and check out my third harvest adventure.
Read more...How to Harvest Organic Vegetables Part 3
This last part of my harvesting journey ends on a high note. I have found that my small exotic Asian eggplants that are green and downright dainty in size are ready! I can’t wait to make something special with them. My basil is also ready and I’m going to take it now before the rabbits get to it. Another surprise is that my Tiffen Mennonite heirloom tomatoes are also ready and - believe it or not, they are yellow! I can’t wait to get cooking. Thanks for watching and I hope your harvest season is as exciting and full of surprise as mine has been.
Read more...The Dancing Snail
Every garden has it's pests, and some are more talented than others! This little guy was found dancing across my zucchini leaves, and inspired us to take a closer look at this common garden pest.
Snails are notoriously slow creatures, and are often very small. But donʼt be fooled, they can wreak havoc on the unsuspecting gardener, leaving your squash leaves looking like a lace doily in a matter of days.
Read more...Growing Tomatoes
Tomato Planting Tips
I am slightly obsessed with tomatoes. In fact, I grow about 25 different varieties of tomatoes each year. In this video, I am joined by my friend and fellow tomato enthusiast, Urban Gardener, William Moss. Check us out; we’re talking about the dos and don’ts of planting tomatoes. You don’t want to miss it.
The most important thing to know about tomatoes is that they must be planted deeply. – The roots grow out of the stems and the root balls bring water and nutrients to the plant and so it’s critical that they are planted deeply enough to access all of the nutrients from the soil. Make sure to remove all of the branches that are going to under the soil. All areas of the stem can produce new roots - so don't worry. It’s always important to add compost to your soil and make sure that the compost contains calcium.
Read more...Night Shade Plants
To properly grow tomatoes they need to have a good amount of water, be supported, and get plenty of sun, Potatoes are just the opposite…
How can they be related?
If it’s late spring you may notice that gardener’s conversations have turned suddenly to potatoes and tomatoes. It’s that time again! What could potatoes and tomatoes possibly have in common? Nothing! Guess again, they’re actually cousins - both from the Night Shade Family and both native to South America. If you’re not an expert on vegetable families, your naked eye might notice the similarities in their leaves. After that, I’m afraid that’s where the similarities end.
Read more...Planting Potatoes
Watch while I plant potatoes in a 4X8 raised bed with melon, tomatoes and greens. Planting Potatoes is a unique experience, you'll be surprised. I'm going to plant Yukon Gold and Russet potatoes.
You probably won't believe that this thing that I am holding is actually a potato seed, not a potato. A potato seed can grow a lot so you need to break up the seeds into sections. You will notice that potatoes have some holes in their skin. These holes are called "eyes." You need at least two eyes for each section that you are planting.
Read more...My Almost Record Tomato
I am not a competitive type, but I must admit that I was very curious to see how all of my gardening efforts were measuring up with others tomato growers. Size does matter, sometimes.
I looked online and found that one of the largest tomatoes grown in the state of Massachusetts was 1.76 pounds. Although I never officially entered any competitions, I had a feeling in my bones that, unofficially, I could be a winner, too.
With cameras rolling and you as my guests, we’ll go down to my garden to find the biggest tomato I’d ever grown. It’s massive. You’ll be impressed.
Read more...How to Can and Preserve Food
How to Preserve Pears
My family loves pears! Because pears are so easy to grow, we always have a surplus. Today, I am going to show you a delicious way to hold on to the many pears that you will have once you start.
Today I am working with Bartlett Pears which are the most common pears and you see them all the time in the supermarket. The reason that pears are so abundant is that they come from huge trees that are very prolific. One pear tree can produce as many as 400 pounds of pears.
Read more...How to Dehydrate Persimmons
Today I’m hanging out with persimmons! What are those? Persimmons are an unusual fruit that you don’t hear a lot about, but I’m here to tell you that most people don’t know what they’re missing. Today I am dehydrating persimmons because they are a delicious, healthy snack. Besides, I have a ton of `em. My two Persimmon trees are quite prolific. Watch carefully because while I’m at it, I’ll even throw in a lesson on how to use a dehydrator, which is something that every gardener should have. What else would you do with all of that extra fruits and vegetables? To maximize the food you can produce you need to know how to preserve your harvest. There are many different ways to preserve fruit. Dehydrating them is a great way to preserve your fruit.
Read more...Preserving Fruit: How to Make Jam
Today I am making Jam. It is the easiest and tastiest snack to come out of your edible landscape, and your family will love it. I like to make an unusual jam which is a mixture of grapes and blueberries.
I take my fresh or thawed grapes and blueberries and puree them. The pureer is a great tool because it separates the good stuff from the bad. Once you mix the juices together and they come out of the pureer, give it a taste it to see if it's sweet enough. The pure fruit is very tasty but the sweetness of your jam depends on you and your family's personal preference. I like to add just a little more sugar. I put the sugar and the juices on the stove to boil.
Read more...How to Make Pickles
One great way to preserve all of those delicious fresh vegetables for the winter is by pickling them. In this video, Iʼll take you step by step through the process of seasoning, jarring, and sealing up your cucumbers to make tasty, crunchy pickles right in your own kitchen.
The first step is to choose the right pickles. You want to pick them before they get overripe, because the canning process can make them soggy if theyʼre too tender to begin with. A good pickling cucumber is one that is fully grown, but still that bright green color.
Read more...How to Preserve Vegetables Using a Vacuum Sealer
It's finally harvest time, and some of us are producing more food than we could possibly eat all at once! Don't fear, you can keep your veggies fresh for over 6 months by vacuum sealing them! In this video, Iʼm going to walk you through the process of sealing up your produce air-tight to store in the freezer all winter long.
A vacuum sealer is a really handy appliance, and a staple for the home vegetable gardener. You can get them online or in kitchen supply stores, and they come in a wide range of brands and prices, so choose one based on your needs.
Read more...How to Preserve Herbs in Ice Cubes
Basil and parsley are some of my favorite herbs, and theyʼre so easy to grow. But that means I usually end up with more of it than I could possibly use all at once. But not to worry, basil and parsley are easy to preserve all winter long by freezing them into ice cubes. Iʼn this video, Iʼll show you how.
Instead of drying them on the stem as you would with some other herbs, you want to remove all the leaves from your basil and parsley and stuff them into a couple of ice cube trays.
Read more...Drip Irrigation
Vegetable Gardening: How to Install a Drip Irrigation System Part 1
I am very fortunate to be here with the President of Drip Works, Leon Springer who is going to spend the whole day with me, taking me through the multiple steps of installing a drip irrigation system.
Why do it?
Read more...Vegetable Gardening: How to Install a Drip Irrigation System Part 2
The second part of this installation is putting a drip system on my patio for my containers, which just entails putting a hole in the mainline and using a vary flow valve. The tubing will run up the side of the container. You will also need a pot dripper, which is a small gadget that goes right into the soil in the container.
Read more...How to Install Drip Irrigation for Container Gardening
What living thing can you leave alone unsupervised and go on vacation? Your dog? No. Your kids? Definitely not. Your container garden? Yes you can!
In this video, I’m going to take you step-by-step through the process of installing a drip irrigation system for your container garden.
Read more...Container Gardening
Making Drainage Holes in a Metal Container
I love the weather-proof shine of galvanized metal containers! These simple vessels add an urban feel to my garden making it instantly chic and sophisticated. I have also found that these containers work perfectly for planting delicate edibles like Mint and Arugula. I leave them out on my patio and both grow back in the spring with no work from me!
Surprisingly, metal containers like the ones you see here, are ultimately reliable in the New England winter and are actually better and much less expensive than terracotta or glazed containers, which need to be moved into the shed or garage when the weather gets too cold. If you don’t, they’ll crack.
Read more...Container Gardening Tips
In this video, I am joined by Mark Highland, soil scientist and owner of Organic Mechanics a soil company. Take a look!
Soil, water, and light are all you’ll ever need to successfully begin a lush, fruitful container garden. Oh, yeah, you will also need a container and something beautiful and/or delicious to plant
One of the first misconceptions about container gardening is that you should only plant one item per container. I thought that too, but I was wrong! Container Gardening actually offers you the same flexibility that in-ground planting offers you. You just have to be mindful of similar water needs in order to plant a grouping together and you have to be mindful of soil lines, so you don’t smother your plants with too much soil.
Read more...How to Grow an Olive Tree in a Container
Perhaps it’s my Spanish heritage, or my love of peace, but for some reason I just love olives! The fact that they are a symbol of peace makes it a no-brainer for me to try to grow my own olive trees.
Of course, living in New England, was going to be a problem for my peaceful gesture but I still was compelled to plant olive trees no matter where I lived. I did the research and found that it was possible with a little extra effort.
Olive trees are grown best in zones 7-9. Living in Zone 6, which is where Boston falls, misses the mark, completely. However, what I did find was that it is possible to grow them in containers, which is right up my alley.
Read more...Container Gardening: How to Plant Blackberries
I am adding blackberries to my container garden, and I am very excited. I am going to be planting Apache Blackberries. What's neat about these particular blackberries is that they are thornless. Unfortunately my timing is off. Had I started in April, I would have been seeing some blackberries as early as June. But since it is the middle of summer I will have to wait for my blackberries until next year.
It's worth the wait.
Read more...Kids Gardening
How to Make Seed Tape
Proper spacing of your vegetable plants is one of the hardest and most annoying things to get right when you're trying to grow vegetables, especially when you're planting tiny seeds like carrots and lettuce. By making your own seed tape at home, you can get your kids involved in planting and make sure your seeds are spaced out correctly all at the same time.
Homemade seed tape is a great project for me and my daughter to do together on a rainy day. All you need is some flour and water, toilet paper, paint brushes and seeds.
Read more...Starting Seeds Using Toilet Paper Rolls
Starting your won seeds indoors over the winter is a great way to save money, get stronger plants, earlier blooms, and a longer growing season. But what if you don't have a seed starting kit like my Hot House?
There are lots of ways to start seeds using recycled household materials, and one of my favorites is using old cardboard paper towel and toilet paper rolls. Its a great way to recycle, and you don't have to transplant your sprouts from plastic pots in the spring, because you can just bury the whole tube in the ground!
Read more...Garden Kid TV: Grubbin' In the Garden Episode 2
Join me for a fun moment with my daughter, Ale, aka the Garden Kid, as she shows you what her favorite part of gardening is: eating! She's going to show you how she picks blueberries and raspberries from my garden, which are her favorite snacks. Sometimes she can't even wait until they're ready to eat, and picks them before they're fully ripe. Today, she is preparing to make some cereal with fresh berries. Meet her at the pond, while she enjoys a peaceful and healthy breakfast. Her third today!
Read more...Simple Newspaper Pots
Making newspaper pots is so simple that I explained it to my daughter, Ale, and she is going to show you how to do it. Newspaper pots are actually tin cans covered in newspaper. They are ideal and cost-effective containers for starting seedlings.
As Ale shows you, all you need is some recycled tin cans, spare newspaper and tape. You attach strips of tape onto the cans and then add the newspaper by rolling it over the tape, and just folding under the loose ends at the bottom.
Read more...Eco Friendly Christmas Tips
Every season 35 million trees are cut down to accommodate the Christmas season. One tree has the ability to remove 48 pounds of carbon from the atmosphere.
There are countless lessons to teach our children at Christmas time. In addition to this holiday not being about the gifts or material things, you can also teach them about how to make Christmas a time that we preserve our earth. You might be thinking, BORING – but just look at the video and see how much fun being eco-friendly at Christmas can be.
Read more...Favorite Holiday Gifts for Gardeners with an Eco-Friendly Twist!
Re-produce, Recycle and Reuse is the key to holiday gift giving. Not only is today’s economy worse than ever, the importance of being eco-friendly is more than a buzz word, it’s crucial.
This video offers you some wonderful ways to make the holiday season more bountiful than ever with more thoughtful and useful gifts. In this video, I show you what I plan to give, but I hope it inspires you to think specifically about your friends and loved ones. Think about what would be pleasing to them; less expensive for you and most earth-friendly.
Read more...Growing Strawberries: A delicious ground cover
My advice is to plant more than one type of strawberry plant variety for a
prolific and staggered harvest.
Strawberry Fields forever…Now I know what the Beatles were talking about…Although, I dutifully planted strawberries last year, I didn’t get the abundant harvest that I was hoping for. So this year, I have a new plan and I think I will be closer to those strawberry fields of the song…
Read more...Gardening with Kids
One of my favorite things about gardening is that it is something constructive and meaningful that I can do with my daughter. Today you will catch us in the garden at lunch time at the start of the summer. Alejandra and I are scanning the garden for salad makings and we have found several! Effortlessly, my daughter is learning her way around a garden. In my garden, we both spotted radish, peas, green beans, dill, basil and Kale! We are ready to eat!
Read more...The Garden Girls Pick Blueberries
Today my daughter Ale, also known as the Garden Kid, and I are headed to New Hampshire to pick blueberries at Ale’s grandmother’s house. We’re psyched because there’s so much great stuff to get from her garden! We are very happy to find that the blueberry bush has grown into a virtual wall of blueberries and since it’s a high bush blueberry bush, it will conceivably grow from 4-7 feet tall. Ale and I have lots of fun picking these huge plump blueberries; many that we will take home and plenty that we eat right on the spot. In between pitching berries into Ale’s mouth and missing a lot, we talk about the benefits of blueberries and their abundance of anti-oxidants. Ale asks me what they are and I explain to her that they contain and element that helps fight the onset of disease. She wants more!
Read more...How to Make Seed Balls
What's great about wildflower seeds is that you really don't need to sow them in formal rows in raised beds like I do with my vegetables. There are a lot of creative ways to plant flowers in your yard, and one way is by making seed balls.
Seed balls are basically seed clusters, held together by a clay soil medium, that you can throw wherever you want plants to grow. This method is great for wildflowers, decorative grasses, or even herbs, but I like to do it with a blend of many different perennial wildflower seeds, so I'll be able to enjoy them year after year. Seed Balls are really fun to make!
You can make as few or as many seed balls as you want, as long as you keep your ingredients in the right proportions.
Read more...Knitting and Crafts
How to Shear a Rabbit for Spinning and Knitting Angora yarn
Proper spacing of your vegetable plants is one of the hardest and most annoying things to get right when you're trying to grow vegetables, especially when you're planting tiny seeds like carrots and lettuce. By making your own seed tape at home, you can get your kids involved in planting and make sure your seeds are spaced out correctly all at the same time.
Homemade seed tape is a great project for me and my daughter to do together on a rainy day. All you need is some flour and water, toilet paper, paint brushes and seeds.
Read more...How to Card Angora Fiber for Spinning and Knitting
This is simple and ultimately rewarding. You will see that I have a basket full of that gorgeous hair that I sheared from my angora rabbit. I am working with it by the handful only. I am working with two hand carders (brushes). The first time I run the wool over the carder to make sure the fibers are lining up. Then once the whole handful is on one carder, I use the other to transfer the fibers from one to the other. It is important to make at least three passes from one brush to the other. We do this to make sure the fiber has no vegetable matter, dirt, flecks of matter, etc…You just want the fibers to be as clean and pure as possible. Once you have transferred the fibers from one card to the other at least three times, I did it four times; the last hairs that are left on the empty card will not be used. It is best for the hairs to be at least 3” long – any hairs less than that will not work as well as I spin into yarn. All of the hair that is left on the other card, you are now ready to take it off of the brush and roll it up into a rollag.
Read more...How to Hand Spin Wool
Did you know that you can make your own garments with your own hand spun yarn?
You can because I do it all the time. Today you are finding me in the “Tiny House” which is my favorite place to spin yarn. It is a miniscule building on my property and I snapped it up as the place for me to do what I love…spin.
The yarn that I spin comes straight from the animals that I have raised on my farm. Today, I’m working with Angora (rabbit) and Pygora (goat) fibers as well as Merino wool.
I won’t say that what I am about to teach you is easy, but I will say that it’s totally worthwhile.
How to Make a one Bobbin Scarf
It’s a rainy day and I am in my tiny house spinning again! I told you, it’s addictive. Today I’m working on making a one bobbin scarf which is unique because although I am using only one bobbin, I am able to combine several different types of fibers which will make a very unique handspun scarf that everyone will admire and you can tell them…it’s not available in stores!
You see here that I am working with Merino and Pygora Fibers. I like to work with Pygora because, believe it or not, it is seven times warmer than wool. The only challenge of working with Pygora is that these goats have unique hair that includes “guard” hairs that have to be removed before spinning it into yarn. The angora fibers can be slippery, but they are super-soft and leave cloud-like puffs in your fiber. It’s unique and attractive. Look at it.
Read more...How to Shear a Pygora Goat
I’ve come a long way baby! From a city apartment near the East River to shearing pygora goats on my urban farm in New England. What a difference a day makes. Today, I’m shearing my Pygora goat with my friend, Sam, who has been raising goats for nearly a decade.
Read more...Using Milk Paint
What is Milk Paint?
Today you're going to find out.
I'm doing some exterior painting in my garden and milk paint is a special paint that does extremely well with unfinished woods. It is called milk paint because it is made from milk protein, and it soaks up color extremely well, finishing with a nice matte finish. It adds a rustic look to everything that it touches which is why it's so popular for those who know about it, and wood workers swear by it. Once your item is painted, with all the colors except for white, the paint shows water marks which makes your pieces look even more rustic and unique.
Read more...Herb Garden
How to Make a Cilantro Martini
This is a deliciously cool, refreshing drink that starts in the garden. Or at least it should.
Read more...How to Freeze Culinary Herbs
Fresh herbs look amazing in the garden and they taste even better in all of your favorite foods…especially Italian food. You probably guessed that I would say that. Today, I’m going to teach you a cool way to preserve your herbs for the whole year. Come with me….As you will see I have a delicious variety of parsley and basil. They are both a vibrant green and so aromatic that I just want to eat it all. Take off just the tops of the plants so they can continue producing. Then I take them into the kitchen and make sure that I have spices for the rest of the year.
Read more...Shaker Medicinal Herb Garden
Shakers learned everything they know about staying healthy from Native American wisdom. Today I am going to show you how to make three holistic teas that have been keeping people free from common complaints for thousands of years. Be sure to ask your doctor before using these teas, especially if you are taking a prescription medicine.
I am going to make three types of medicinal teas: Hyssop Blue, Feverfew and Bee Balm. Hyssop Blue is known for it's assistance for chest congestion and coughs. Feverfew prevents migraine headaches and should be drank daily as a preventative measure. Bee Balm helps with nausea and digestive issues.
Read more...30 Minute Herb Garden
Welcome to "no-excuse gardening." In just 30 short minutes you can have an herb or vegetable garden, which will be an excellent first project if you are new to gardening. If you are a seasoned gardener, using Garden Soxx is just the perfect way to start something new, without spending too much time, because you probably don't have much free time as it is.
Garden Soxx, which were originally designed for erosion control, have also become a new way to plant in small spaces, which makes them perfect for raised bed gardening. Garden Soxx are cleverly made from a synthetic fabric which is stuffed with 1 cubic foot of compost, and they will last from 3-5 years.
Read more...Sun Brewed Mint Iced Tea with Lemon
What you'll need:
- Sprigs of Mint
- Tea bags
- Fresh Lemons
- Sunlight
Soil and Compost
Composting Kitchen Scraps with a Worm Bin
If you ever thought you were scared of worms, now is the time to get over it. A worm bin is a perfect eco-friendly solution for anybody with a small patio or garden. It also is ideal for condo dwellers where there are rules and regulations against composting. The worm castings (or worm ‘poo’) make the best natural fertilizer, and its power can be extended by brewing up worm tea to apply when watering all your plants. Not only is your homemade compost great for your garden, it reduces waste in landfills by getting your kitchen scraps to work for you and your edible landscape.
Read more...Healthy Organic Soil and the Importance of pH
I'm here with my friend William Moss, who is going to give us a quick lesson on how to prepare a raised bed for planting. We have all we need; a good location with about 6-8 hours of sunlight, and a raised bed that needs to be cleared out and prepared for the next planting season.
The first thing to do, especially if you are working in a raised bed that was used last season is to remove last year's debris. Never fear, the "debris" will not go to waste. It will go right into my compost bin.
Read more...The Best Use for Fallen Leaves in the Garden? Make a Compost Bin!
It’s time to start getting the cold weather crops into the ground so today, I am joined by my friend, William Moss and we are talking about sowing seeds in a raised bed garden. See how simple it is to usher in a bountiful harvest.
We are planting lettuce, radishes, Asian Greens and onions. Onions do take a while so we need to get them in the ground now.
Read more...First Aid for a sick plant: Compost Tea
Compost tea works! I have seen it have miraculous results. Healing sick plants – now that’s my cup of tea!
Hold the sugar. This is NOT your cup of tea. This is tea for your plants. In this video, I am joined by my friend Mark Highland of Organic Mechanics. You may have met Mark before, he’s my soil expert. Mark has spent most of his career researching soil and creating a unique blend of high quality soil that will do wonders for your garden. His unique blend includes compost, worm castings, coconut fiber, pine bark and perlite. The ratios of these ingredients are perfect after a decade of researching and getting it just right. The unique biology of the ingredients creates a sort of “Super food” for your plants. The macro pores produce a poly-saccharine that is sticky to the touch and works hard to retain the moisture in the soil, further nourishing your plants.
Read more...How to Make Compost
I am joined here by my good friend and colleague William Moss to talk about one of my favorite topics, composting! As you know, composting is the environmentally safe way to improve the quality of your soil by using natural waste from your yard as well as kitchen scraps. It is the easiest way to be a responsible citizen of the earth. Compost is free fertilizer and an excellent soil amendment.
William and I are using the simplest version of a compost bin which is 19 gauge hardware that comes in a roll. You can make a cylinder with it, as you see here, and use kitchen ties to bind it together.
Read more...Backyard Chicken Coops
How to Build a Chicken Tractor
Why is it called a chicken tractor? I’ll tell you why - A chicken tractor is kind of like a tractor in that it’s a movable structure that’s easily moved around in your garden allowing you to choose which areas of the garden need fertilizing and/or cleaning up. A chicken tractor works similarly to an electric tractor is that it goes where work needs to be done.
Chickens are awesome at cultivating soil with their sharp-clawed feet and while they’re at it, they are also feasting on everything green and catching bugs and leaving deposits of their nitrogen-rich manure. The digging and scratching action will incorporate rich manure into the soil, making the soil perfect for plant growing.
Read more...Make Way for Ducklings
My first experience raising ducks wasn’t the greatest, but they sure were delicious. This year the family and I decided to try it again, but this time just for fun. Our big pond was just calling for wild birds. We raised them indoors starting when they were a day old. Soon we took them outside to walk around near the pond and they went into the pond. I find it so fascinating that they always stick together. What a great way to spend an early spring day watching the ducks.
Read more...Chicken Chase
Welcome to another day in my life. Here you see what happens when I move my own chicken tractor to a new location to service a fallow bed that needs to be revitalized. If you caught the video where I built the chicken tractor (with my own two hands!), now you can see it in action; the perfect place for protecting my chickens. The tractor is currently housing month-old Araucana chickens that have another month before they will start laying eggs. This is the perfect time for them to be working.
Read more...Bantam Chick=Black Gold
I love my house, but I hate my soil! Urban gardeners are often met with less than desirable soil. But I’ve figured out how to work around that urban handicap.
I’d like to introduce you to a few of my favorite friends – I call them “my A-Team.” They have the power to transform my less than great soil into Black Gold!
Read more...My Trip to the Chicken Processor
I wake up extra early when I take a trip to the chicken processor. This time, you’re coming along with me as I prepare for a big party at my house and will have many mouths to feed. My Rock Cornish hens are in the back of my truck and I’m headed outside of Boston to leave them with the processor to be “processed.” At the end of the day, they will be ready for pick up packaged just like in the supermarket – but much, much better!
Read more...Healthy Recipes
How to Make a Healthy Smoothie with Pawpaws
First you’re asking what are Pawpaws? Believe it or not they are the largest fruit native to North America! They are a delicious fruit very common among Native Americans. The only reason you don’t see them in your local supermarket is that they don’t have a long shelf life making them unable to transport them. The disappointing thing about that is that Pawpaws are absolutely delicious and should be at the top of everyone’s grocery list! Pawpaws are most abundant in September and they are mostly found in the wild. They are actually berries and you will see them in yellow, green or brown as you see here. When pawpaws are brown it means that they are the ripest and most delicious!
Read more...How to Make Stir Fry Beef
My Asian Greens are ready for harvest and tonight my family will have one of my favorite stir fry meals. It’s amazingly simple and tasty.
Watch.
My beef strips have been marinating overnight in Asian BBQ marinade which is easy to find in your grocery store.
In my wok, I have oil, chopped garlic and shallots and am sauteing them. Once the garlic and shallots start to brown, it’s time to add the meat. Because the slices of beef are thin, it’s important that the meat doesn’t cook for too long. In fact, you must be careful not to overcook. Once the meat is cooked, you simply add the chopped up Thai Cabbage, Bok Choy and scallions into the wok. Stir them together so that the oil saturates the greens, wilting them, slightly.
Voila. Dinner is served.
How to Make an Omelet
My Omelet d' Frommage is a quick and easy cheese omelet. I am sure you already know how to make an omelet, but what I am going to show you is how to make a spectacular omelet with garden fresh ingredients. Dazzle your next breakfast crowd.
I am using my ceramic Flameware skillet on the stove., While most clay pots cannot be used on stoves, my flameware skillet is made out of pottery clay that is then fired at a high temperature allowing it to be stove ready.
Read more...How to Roast and Stuff a Chicken
This is as traditional a dinner as it can get, but your family will adore it. I am making baked chickens with two Rock Cornish hens that I raised myself. The key to this recipe is to make it with fresh ingredients. I am working with a very traditional stuffing of bread crumbs, sautéed onions and celery and a host of other fresh herbs from the garden. Although it is a simple mixture, the freshness is what will make the flavor burst in your mouth.
Read more...How to Make Maple Syrup
Today I am visiting with Uncle Ted who has been making syrup all of his life, because his father did when he was growing up. Some traditions are hard to break.
When I arrive, Uncle Ted already has a maple tree tapped and the sap is already dripping slowly into the bucket. He says this tree has been tapped for about a week and it is still dripping sap. Uncle Ted lets me put in another spout and lets me use the crank to get the tap securely into the tree.
Read more...How to make Gazpacho Soup fresh from the Garden
My tomatoes are ripe and it’s the perfect time for soup! But not just any old soup, Garden fresh Gazpacho…And, it’s cold.
Let’s take a trip through my garden and get all of the ingredients you need for this simply divine recipe.
The first thing I see is Arugula one of my favorite greens. Actually, Arugula is an herb, it’s a wild plant that grows well and gives your salads a unique look and an interesting flavorful taste. It will go perfectly with your Gazpacho.
Read more...Tips for making stuffed Grape Leaves, Dolmades
Dolmades: is an Arabic term meaning "something stuffed." Dolma (stuffed vegetables) became "Dolmades" in Greece. Dolmades can be stuffed with a number of things to suit individual tastes. They are sort of like the Greek version of Burritos.
Cultivating grapes takes time…a long time; three to four years, in fact! But once you make the investment to grow grapes, the rewards are endless. Their leaves are an added bonus that Greeks have known about for centuries. My neighbors’ Greek grandparents come to visit every year and they always get their grape leaves from my farm to make Dolmades.
Read more...Wasabi Vinaigrette Salad
I'm treating myself to lunch today. First, I'm starting by hand picking my fresh lettuce straight out of the garden. Wait until you see how much money you are saving by making this restaurant-style lunch right at home.
Read more...How to Make Stuffed Squash Flowers
Did you know that in addition to the fabulous vegetables that squash, zucchini and cucumbers plants bear, they also bring flowers? And, the flowers are completely edible! I am in my French Kitchen Garden Raised Bed and I am admiring how plentiful my squash are this season. Because I don't believe in wasting anything, I am going to show you a recipe that utilizes these tasty squash flowers. Come inside and be prepared for a delicious snack or an elegant appetizer.
Squash flowers are a rare treat because the squash flower ony lasts one day. They must be picked at dawn and placed in a bowl of cold water in the the refrigerator and use the same day.
Read more...Fall is a Perfect time for an Asian Garden
Cold hearty lettuces and vegetables will extend your growing season and bring exotic Asian flavors to your dinner table:
Try these this Fall:
- Four Season Lettuce (Merveille Des Quatre Saisons)
- Romaine
How to Make Thai Cabbage Salad
I have most of the makings of this awesome salad right here in my Asian Greens raised bed. To make this salad, I will harvest Thai Cabbage which is not your typical cabbage. Thai Cabbage does not grow as a "head," it is actually individual thick leaves that have a thick core in the middle that is easily removed. Watch how I do it.
For the salad, I will use about three leaves of cabbage, Thai basil and cilantro.
Read more...How to Make a Sage Martini With Apple
Herbs are good for more than just cooking. You can also use fresh herbs to flavor some delicious homemade cocktails. In this video, Iʼm going to share with you my recipe for a sage martini with apple.
Read more...How to Make vodka Thyme Lemonade
Another way to put a garden-fresh twist on a classic cocktail recipe is by making thyme lemonade. This unique and refreshing drink is easy to make, and an instant hit.
Read more...